You know that moment when you’re sitting at a cafe in Lisbon, or watching the sunset from a Greek island, and you think “I want to remember this feeling, not just take another photo”? And phone cameras are such good quality these days, but somehow scrolling through 500 nearly identical shots of that temple doesn’t bring back the smell of street food or the sound of scooters zooming past.
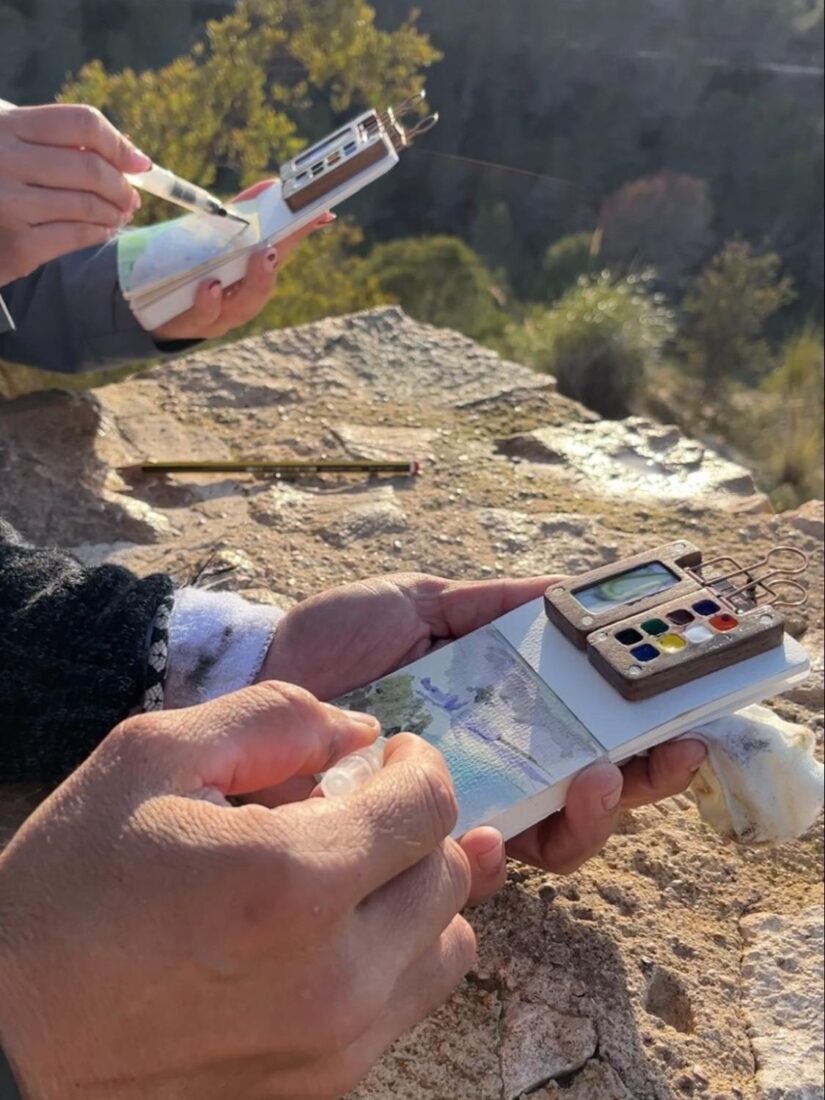
That’s where a simple watercolor travel journal comes in. It’s not about creating gallery worthy art, it’s about slowing down for ten minutes and actually noticing the place you’re in. The crooked shutters. The specific shade of blue on that door. The way the light hits your coffee cup.
And the best thing is that you don’t need to be “good at drawing” to make this work. You just need a tiny paint kit, ten minutes and a willingness to try your hand at painting something that looks more like a memory than a photograph.
Why Watercolor Journaling Is Perfect for Travel
Watercolors are honestly one of the best creative hobbies for people who actually travel (not just people who post #vanlife content from their driveway). The setup takes about 30 seconds. The cleanup is rinsing one brush. Your entire kit fits in a ziplock bag.
More importantly, it turns dead time into something calming. Waiting for your Airbnb host? Paint the street corner. Long train ride? Paint the view. Jet-lagged at 5am? Paint the sunrise.
And unlike buying another magnet or shot glass, your journal weighs nothing, takes up no suitcase space, and actually gets better the messier and more personal it is.
The best part? Once you have a proper travel setup, you’ll find yourself reaching for it in situations you never expected such as airport layovers, beach days, even rainy afternoons when outdoor plans fall through.
The Screen Detox You Didn’t Know You Needed
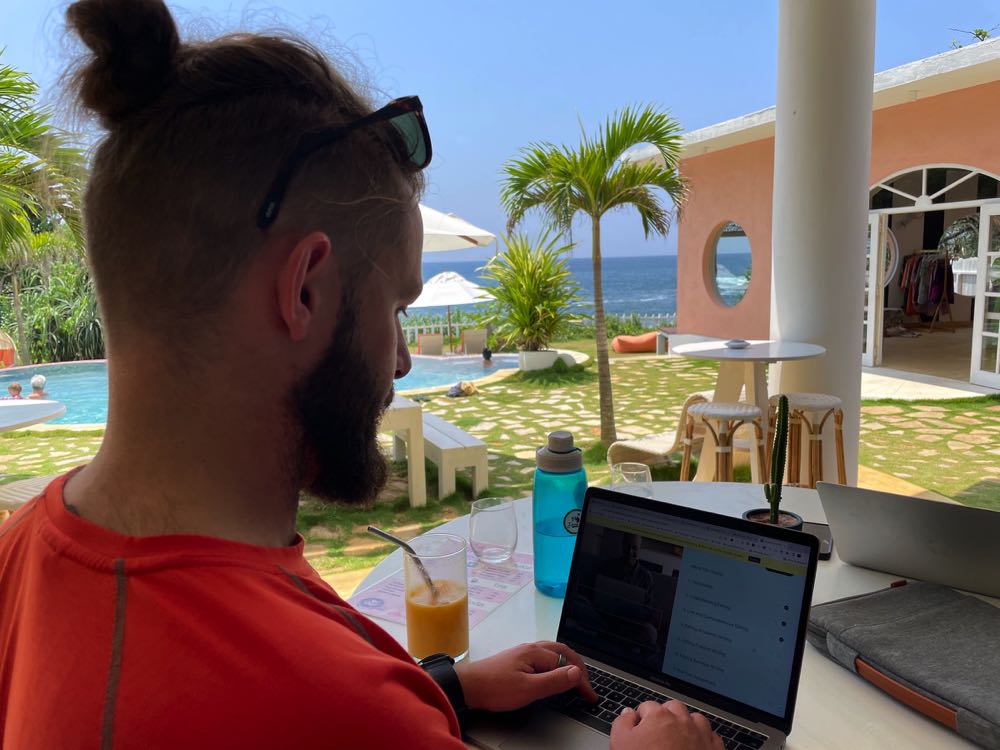
If you’re a digital nomad or remote worker, chances are you spend most of your day staring at screens. You work on a laptop, unwind on your phone, and often experience new places through a camera app. Travel is meant to feel freeing, but the blue light tends to come with you.
Watercolor journaling offers a genuine mental reset. No notifications, no algorithms, no temptation to “just check one thing.” It’s simply you, pigment, water, and whatever’s in front of you.
The shift is noticeable. Mixing a color to match the terracotta of a rooftop pulls your brain into a calmer, more focused state. Psychologists call it “the flow state,” but what you’ll notice is quieter mental noise and less physical tension.
For remote workers, this contrast matters. After hours of problem solving in documents and spreadsheets, switching to a tactile, fully analog activity isn’t just relaxing – it’s restorative. You return to work clearer and more focused.
It creates a boundary between “work mode” and “travel mode” that’s otherwise hard to maintain when your office is wherever you open your laptop.
Building It Into Your Remote Work Rhythm
For those working while traveling, watercolor journaling can double as a productivity tool. A clear transition ritual makes both work and exploration more satisfying.
Imagine finishing a four-hour deep work session at a coworking space in Chiang Mai. Your eyes are tired, your brain is foggy and the evening is wide open. You could scroll social media, or grab your painting kit, walk to a nearby temple, and spend fifteen minutes painting the entrance gate.
That second option actually resets your brain. It gets you outside, anchors you in the place you’re in, and creates a real memory instead of another blur of cafés and laptop screens. It draws a line between working in Thailand and experiencing Thailand.
Over time, many remote workers find their days blending together. You’re in incredible places, but most of your memories are Slack DM’s and video calls. A watercolor journal becomes proof that you were present, not just geographically, but mentally too.
The 10-Minute Routine (Do This on Any Trip)
Here’s the routine that works even when you’re tired, rushed, or sitting on a wobbly plastic chair somewhere in a Mexico back street waiting for your favourite taco stand to open.
Step 1 (60 seconds): Make a tiny thumbnail sketch. Don’t draw details, just capture the basic shapes. A rectangle for a building. A curve for a mountain. A blob for a tree. Seriously, that simple.
Step 2 (2 minutes): Add a light wash of color to the big shapes. Sky = light blue. Building = light ochre. Don’t worry about staying in the lines.
Step 3 (4 minutes): Pick 1-2 focal details to actually paint. Maybe it’s the cafe sign. Maybe it’s one ornate window. Maybe it’s the mountain silhouette. Not everything, just the things that your eyes rest on.
Step 4 (2 minutes): Add one darker wash for shadows or contrast. Mix a darker version of your main color and dab it where the shadows fall. This single step makes everything look 10x more real.
Step 5 (60 seconds): Write a memory note. The date, the place name, and one sensory detail. “Lavender smell everywhere.” “Waiter spoke 6 languages.” “Wind kept blowing my napkin away.” These notes matter more than you think.
Quick tips: Use way fewer colors than you think you need. Three is plenty. Stop earlier than feels right. Overworking is the #1 reason beginner sketches turn muddy.
Choosing a Carry-On-Friendly Setup (Keep It Small)
This is where most beginners either overthink it or under-prepare. The truth? Your gear matters less than having everything in one grab-and-go package that you’ll actually use.
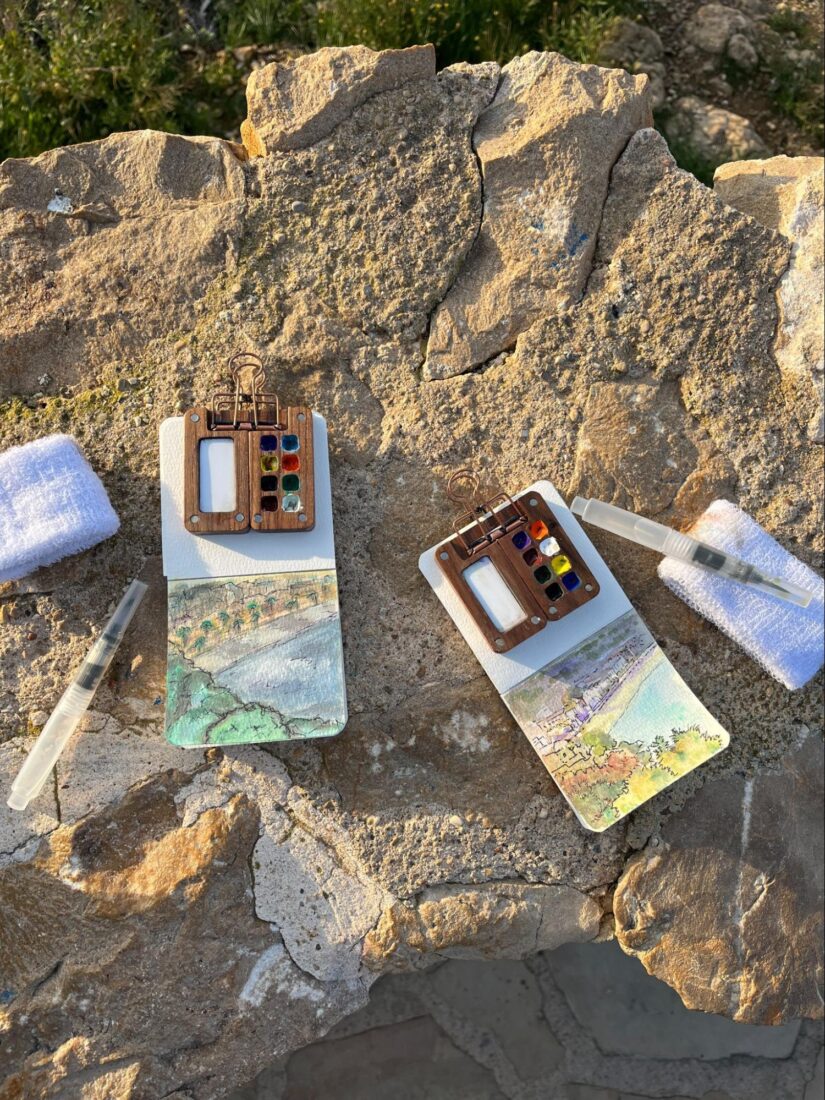
What you actually need:
- A compact watercolor palette with 8-12 colors (more than that and you’ll never use half of them).
- One quality travel brush that holds water well (or a water brush with the built-in reservoir).
- A travel-sized sketchbook with paper that can handle wet media (this matters way more than expensive paint).
- A small scrap of cloth or tissue, plus a tiny collapsible water container.
It’s way easier to get a quality setup together before you set off on your travels. Because piecing together supplies from random art stores in different countries is a headache. You end up with incompatible pieces, missing essentials, or realizing mid-trip that your paper buckles or your palette leaked.
If you’d rather not build your setup piece by piece, a travel watercolor kit by Tobio’s Kits designed specifically for travelers can make it easier to actually stick with the habit on the road. The difference between “I should paint today” and actually painting often comes down to whether your supplies are already organized and ready to grab.
Look for complete kits that include quality paper, a curated palette that works together, and a compact case that protects everything in transit.
Why complete watercolor kits make sense for travelers: Everything’s color coordinated and tested to work together (no muddy surprise mixes). You know exactly what fits in your daypack before you leave home and there’s no missing pieces when inspiration strikes at a viewpoint. You need better paper quality than most separate sketchbooks (cheap paper = frustrating results). And the case usually doubles as a mixing palette and protective shell.
The Ultralight Advantage for Backpackers
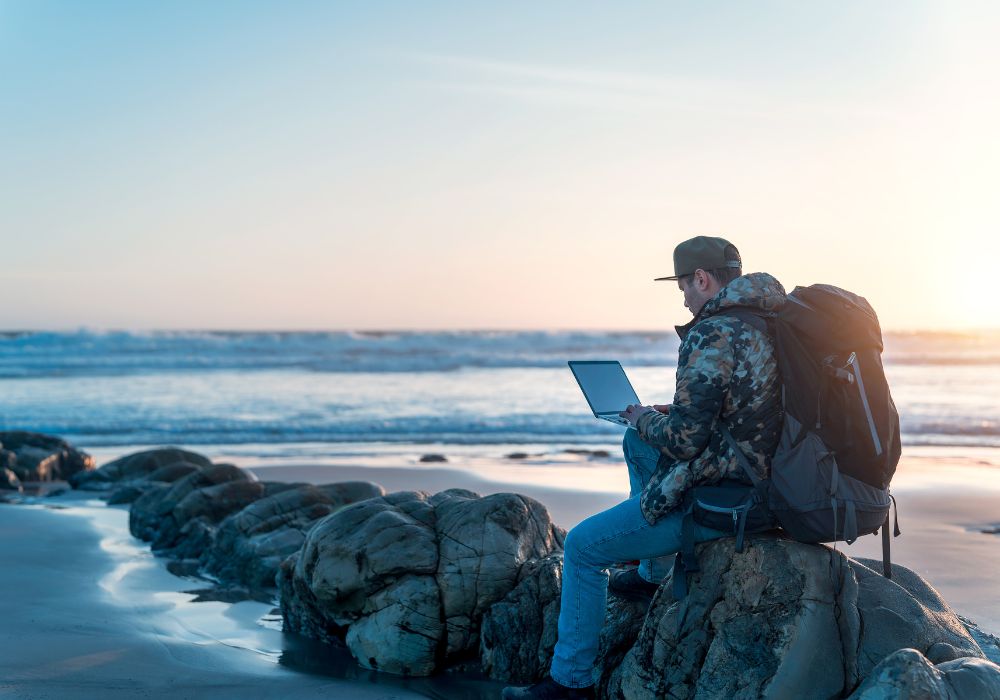
If you’re traveling with just a 40-liter backpack or living out of a converted van, every gram and every cubic centimeter counts. You’ve already said no to the extra pair of shoes, the “just in case” jacket, and probably half your toiletries. So why would you add a creative hobby to the mix?
Well watercolor journaling is possibly the most weight efficient creative pursuit that exists. A proper travel kit weighs less than a paperback book. It takes up less space than your charging cables. And unlike a camera with multiple lenses or a full sketching setup with pencils, erasers, and markers, there’s almost nothing to it.
For backpackers doing long-term travel, this matters enormously. You can carry your entire art studio in a side pocket. And there’s no worrying about theft or damage to expensive camera gear. What’s more? If your pack gets soaked in a sudden rainstorm, your watercolors will actually be fine (they’re meant to get wet, after all).
Why Compact Creative Hobbies Work For Vanlifers
Vanlifers have a different but related advantage when it comes to space: limited flat surfaces and storage. A watercolor kit doesn’t need a desk setup. You can paint sitting on a beach, perched on your van’s back bumper, or cross-legged on a picnic blanket.
The self-contained nature of a good travel kit also means you’re not hunting for a cup of water or spreading supplies across a table you don’t have.
There’s also something philosophically aligned between minimalist travel and watercolor journaling. Both are about doing more with less. Both prioritize experience over accumulation. And both reward the people who learn to appreciate simplicity rather than constantly adding more gear to the pile.
Packing Tips To Avoid Disasters
Just in case, wrap your palette in a ziplock bag even if it claims to be leak proof (cabin pressure does weird things). Keep your sketchbook in a separate waterproof pouch if it’s humid or rainy. And use a small pencil case or the kit’s own case for everything this keeps it together and easy to grab.
It’s also a good idea to test your setup at home first; do three practice sketches before you travel.
What To Skip
- Bulky tube paints (they explode, they dry out, they’re messy).
- More than two brushes (you’ll only use one anyway).
- Giant pads or heavy boards (A5 or smaller is perfect for travel).
- Fancy extras like masking fluid, texture mediums, or specialty tools.
Easy Subjects That Always Work While Traveling
If you’re staring at a scene thinking “this is too complicated,” try one of these instead:
Your coffee cup + the receipt next to it. Instant still life. A street sign or shopfront. Letters are easier than faces. One doorway or window. Architecture in miniature. A local snack or fruit. A mango. A pastry. Whatever’s in front of you. Rooftops or skyline from your window. Silhouettes are forgiving. A single plant or flower. Markets and gardens are everywhere. Your view from the train or boat seat. Blur the details, it’s all about the vibe.
Beginner rule: Pick one subject, one angle, one light source. Don’t try to paint the entire plaza. Paint the fountain. Or the tree. Or the bench. Pick one thing and commit.
The beauty of having proper watercolor kits is that you’re never second-guessing whether you have the right color. A well designed travel palette gives you enough range to paint anything from tropical beaches to European cobblestone streets without needing to hunt for supplies.
Real-World Travel Problems (and Simple Fixes)
Let’s be honest: travel painting isn’t always a serene watercolor Instagram moment. Here’s what actually goes wrong and how to deal with it.
- Wind at viewpoints: Use your body as a windbreak. Sit with your back to the wind. Clip your pages with a binder clip. Or just paint bigger, simpler shapes that don’t need precision.
- Humidity or slow drying: Paint with lighter washes so layers dry faster. Or do two small sketches instead of one detailed page. Use waiting time to write notes or prep the next sketch. This is where quality paper really shows its worth. Cheap paper stays wet forever in humid climates.
- Tiny cafe tables or shaky transport: Simplify everything. Paint silhouettes with flat washes. Keep your water container barely filled so it won’t spill. Accept that wobbly lines just look more authentic. Having a compact kit that doesn’t sprawl across the table makes this infinitely easier.
- Muddy colors (the universal beginner problem): Rinse your brush more than you think you need to. Limit color mixes to 2 pigments max. Let each layer dry completely before adding the next. Quality watercolor kits typically include colors that are formulated to mix cleanly, which helps avoid the dreaded “everything turns brown” problem.
But remember, none of these problems mean you’re bad at this. They just mean you’re actually traveling instead of painting in a controlled studio.
How to Keep the Habit Going (Without Turning It Into Homework)
The trick is to make it small enough that you’ll actually do it:
Use the “one page per location” rule. You don’t have to paint every day. Just one page per city, per hike, per beach. Low pressure, high reward.
Pick a theme for the trip. Paint only doorways. Only breakfasts. Only sunsets. Only market scenes. A theme makes decisions easier and gives your journal a cohesive feel.
Schedule it like you’d schedule a museum. Ten minutes after morning coffee. Or during transit days when you’re stuck waiting anyway. Treat it like a tiny appointment with yourself.
Keep your kit visible. If your supplies are buried at the bottom of your backpack, you won’t use them. Keep them in an exterior pocket or the top of your day bag. Out of sight really does mean out of mind.
Start Before You Feel Ready
Here’s your challenge: on your next trip, paint one page within the first 24 hours. Not when you’ve found the “perfect” view. Not after you’ve practiced. Just open your kit, pick something in front of you, and spend ten minutes getting paint on paper.
It won’t be perfect. It might be wonky. But it’ll be yours, and it’ll bring back that trip better than any photo ever could. That’s the whole point.
Whether you’re a backpacker counting grams, a digital nomad craving screen free moments, or a casual traveler looking for a more meaningful souvenir than another fridge magnet, watercolor journaling fits. It asks almost nothing of your luggage and gives back memories you’ll actually revisit.
So stop waiting for the right moment or the right skill level. Grab a travel kit, pick a trip, and paint something ugly. Then paint something slightly less ugly. Before long, you’ll have a journal full of places you actually remember being in not just places you took photos of.